

Hello Everyone! I've been working on learning to make paper flowers for some weeks now. There are many ways to make paper flowers, and lots of great tutorials out there, and I've read and watched a ton of them. I've happened on a method of making paper flowers that I like, and I thought I'd share it with you in this tutorial. Ready? Here we go!

First of all, here are the supplies I used to make my paper flowers (BTW, I'll let you know what I used and where I got them at the end. . .):
Punches of varying sizes/shapes
Paper scraps
Mulberry paper scraps
Small sharp scissors
Waterproof Mat
Brads
Glimmer Mist
Distress Ink
Gold Ink
Sponges
Paper Piercer
Glue Dots
Heat Gun
Optional Things
Embossing Machine
Embossing Folder
Stamps--like flourishes
Step One: Punch your flowers.
I like to make two the largest size and offset them. (You'll see what I mean in a bit.)
Then any decorative middle flowers--I used an aster punch and some mulberry paper.
Then some kind of center.

3 solid large flowers
3 patterned large flowers
3 aster flowers
(mulberry paper in the next step)
3 small center flowers
Step Two: Make the mulberry paper layer.

Rough cut a circle just a bit (maybe 1/8 to 1/4 inch) larger than you'd like the finished circle. I made mine about the size of a quarter.


Here are what my finished leaves look like.
Step 3: Distress and decorate.
There are lots of options here! You could run them through your embossing machine with your favorite embossing folder, you could ball them up spit-wad fashion and unfold them. You could ink them with distress ink or another kind of ink. You could stamp over them with flourish stamps. I think they look better with some kind of distressing--more natural, I guess! Here's what I did to mine:


Then, I squashed them into balls and then unfolded them.

Then, I sponged them with distress ink and gold ink.

Finally, I sprayed the flowers and the mulberry paper layers with Glimmer Mist. I probably did too much distressing and decorating. . . :-)

Dry your layers using a hot air gun.I put them in the lid of a cookie tin so they won't blow away!
Step Four: Put the layers together.

When all of your layers are dry, you can make your flowers.

Layer the flowers as you'd like. I like to offset the plain and pattern flowers so that the petals show behind.

Using a paper piercer, pierce a hole in the center of the stacked flowers.

Place a brad in the hole and spread the brad on the back. I like to press the flower down on the table to flatten out the back of the brad a bit more.
Step Five: Place your flowers and leaves.

I punched some fern leaves, too. I really like the look of these.
Using glue dots, arrange and place your flowers on your card or scrapbook page.
And you are done!
Here is my finished card.


And a close-up of the flowers.

I think my brads are too big, but. . .they are already stuck on the card. So, I'll use smaller ones next time, no worries! :-)

Here is another example of a card with flowers I made using this method.
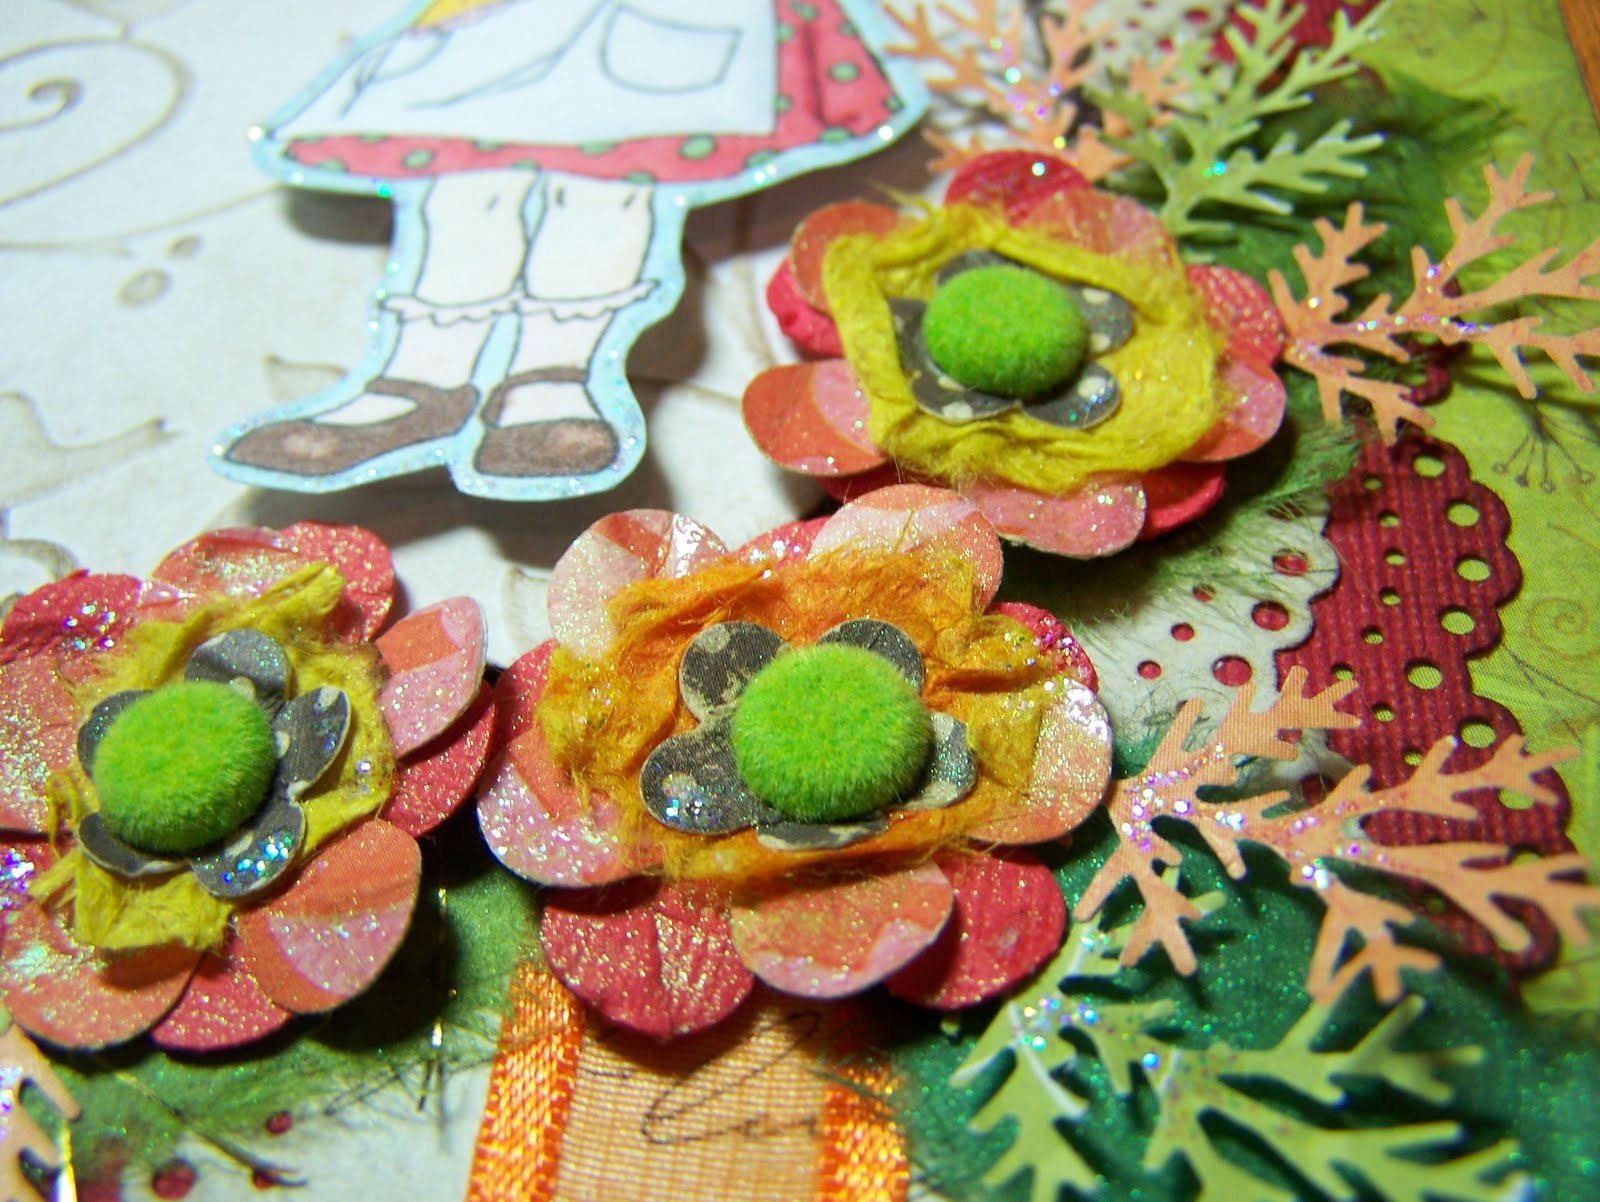
A close up of the flowers. I love the fuzzy brads!
Supplies and Where To Get Them
Stamps: Whiff of Joy April Stamp Kit - Scheherazade (1001 Nights)
Punches:
Ek Success PSM130C Paper Shapers Retro Flower Medium Punch
Paper Shapers Paper Punch: Flower
Stacking Punch -- Daisy
Martha Stewart Fern Punch
Cuttlebug Machine, Die-Cutting and Embossing,
Cuttlebug Embossing Folder, D'vine Swirls
Distress Ink--Walnut Stain
Gold Pigment Ink
Glimmer Mist--I used Wheatgrass
Making Memories Paper Piercer Deluxe
Pearl Brads
Glue Dots
Thank you for viewing my tutorial! It's my first, so please leave a comment and let me know how you liked it! I'd appreciate any input you have to make it better. Have fun and happy stampin'!


2 comments:
what an amazing tutorial and a beautiful card..i really must get some of those punches it looks such fun tfs jan
Just found your tutorial - wow! Your flowers look fab - thank you so much for sharing.
Love, Andrea xx
Post a Comment